Thursday, February 25, 2010

How to Make Butter

I love all the things you can do with raw cream! I started making butter about 3 years ago. It is like second nature to me now. I make it once a week. If it starts to build up, I use it to trade for eggs, babysitting, etc. If you don't have access to a lot of cream and you are getting raw milk. You can start a freezer jar of cream. Add a scoop of raw cream off the top of your milk into the jar and let it accumulate until you have a one or two quarts. Just keep adding it to the top of the cream jar you keep in the freezer. Eventually you'll have enough to make butter.

I've got a simplified process that really really works for me, so I thought I'd share it with you. I use raw cream (your body can digest it much easier when it is raw, leading to less fat storage in your body), but you can also use this same process with pasturized cream. The first thing I do is put no more than 2 quarts of cream at a time in my KitchenAid (I have a Professional 6), wrap the guard with a towel to prevent splattering, put it on the 6 speed setting, and beat it with the paddle you would use for making cookie dough. Depending on what the cow has been eating will determine how long it takes for the butter to separate. Sometimes it can take 45 minutes, other times 15 minutes. I always make sure the cream is at room temperature because it speeds up the separating process. 
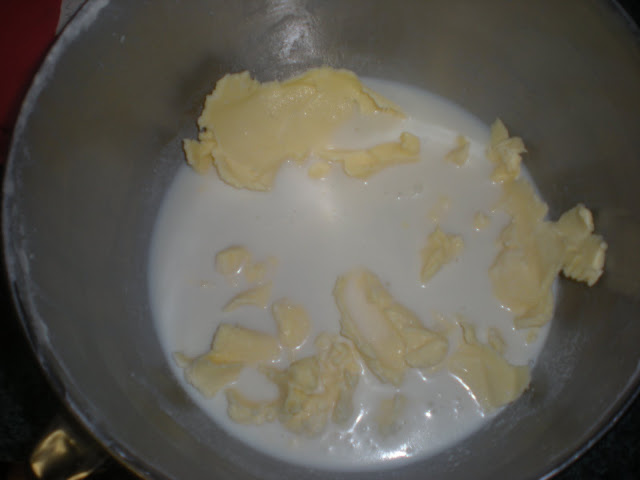
When using a mixer to separate the butter from the buttermilk, really watch it at the end, because the buttermilk will splash all over the place. I ruined a radio that was sitting next to my KitchenAid. It got doused with buttermilk. Not good! Drain the buttermilk into a glass jar (I'll let you know what to do with that in a future post). Leaving the butter in the KitchenAid bowl, rinse and knead until the water is clear, then knead as much of the clear water out as possible. This prevents the butter from getting a sour taste over time. (Note: when cows are eating green grass, the butter is extremely soft.  I put the butter into the fridge for 10 or 15 minutes to get it hard enough to knead. When the cows are eating dry feed, the butter is firm even at room temperature). If you are going to salt the butter, add a tsp of sea salt to approximately a pound of butter (I use fine Celtic Sea Salt). Knead it in well.

Here is another tip I got from the comment section I got from Mrs. Yoder that I'm going to try: 
Thought I'd share a little tidbit that cuts down on butter washing time: after you drain off the buttermilk, put the butter in the blender with icy cold water (maybe a chunk or two of ice and some room temp water, or just cold water) and blend for about 30 seconds. Drain, add more water, repeat. Do this about 2-4 times and your butter is cleaner than anything else you can do to it and lasts forever since the buttermilk is all out. This method takes about 2 minutes versus 10-20 minutes of working if not longer. I sort of feel like I'm cheating, but then I see the results and I don't feel so bad!
You don't have to do this step, but I like to put my butter into a butter mold. It makes it easy to measure for recipes. My husband made me this one pound mold. It isn't fancy, but it works. I just pack the butter into the mold, smoothing down the top (my daughter eats any leftovers).On a piece of unbleached parchment paper big enough to wrap my 1 lb of butter, I flip the mold over and push the loose piece of wood out of the mold. The outside of the mold will be removed, so now all you need to do is slide a knife between the loose piece of wood and the butter to separate.Wrap your butter in the parchment paper, date and freeze if you aren't going to use it right away. Again, you don't need a mold, I just find it easier for measuring butter for recipes. You can shape butter anyway you'd like. I'll let you know what to do with the raw buttermilk soon, then we'll use that to make sour cream. So stay tuned...

If you have any questions, please leave a comment. Have a great day!

God Bless,
Jackie

Tuesday, February 23, 2010

Up and Runnin' Again

Well, I got my computer back (very quickly, I might add). Apparently I had several viruses, one of which attacked my anti-virus program and disabled it (wow, that was worth the $70 annual subcription). Luckily it didn't do any damage. I'm enjoying having a fast computer again - "The better to blog with, my dear". Apparently this virus is contagious because I caught a cold last week. Luckily it didn't stick around long. Now, I'm just doing all the natural remedies to prevent a sinus infection, so far, so good.

I thought I'd catch you all up on our whirlwind weekend. I wish I could show you pictures, but I accidently deleted them off my camera, there-by learning this important lesson: never try to download pictures while trying to referee an argument between a couple of kids :-(

My sweet sis was kind enough to let us drop off our kids while I went to an Oregon Society of Soil Scientists conference on the other side of the state. Michael was able to take time off work and go with me, which was wonderful because it was at a beautiful place called Edgefield Manor - (click here for pictures). We love this place! We had the best room with the best view in the entire place (I think it must have been the honeymoon suite). It was huge. It used to be the county's poor farm, then it was a nursing home. They fixed it all up, put whimsical art-work everywhere, and made it into a fabulous micro-brew, winery and now distillery. They had the most beautiful soaker pool, too. I had a great time seeing all the soil scientists that I've known through the years, plus meeting some new ones. I realized, I'm now an old-timer. When I first started going to these conferences 10+ years ago, I was one of a small handful of women soil scientists, and I was by far the youngest one there. Now, probably half the meetings are made up of women and I'm NOT the youngest one ;P

After the meetings, Michael dropped me off at my sis' and drove back to the Portland area for his first drill in his new battalion. I got to spend the weekend my sister. I was able to help her with my nephew, Jacob's, third birthday. Click on here (Stacie's blog) for details and pictures. Jacob was absolutely adorable in his Buzz Light Year wing pack. He was Buzz. He wouldn't even take them off to eat. We'd just fold his wings back so he didn't poke anyone. It was so cute! I also got to see some of my immediate family, which is always a blessing.

Michael picked us up after his drill on Sunday and we got home very late. We brought my nephew, Marcus, home with us since Stacie is coming up to visit me this coming weekend. It is wonderful to have some time with him. The kids are having fun together (mostly), and it is good for them to learn from each other.

I've had a lot of people ask me how to make raw butter, buttermilk and sour cream, so I'm planning on doing a series of posts on those next. Stay tuned! I'm so far behind on my blogging - yikes :-/. Thanks for all your sweet comments. Keep 'em coming! I promise I will visit all your blogs as soon as I get a chance. I've got them saved in my email so I don't forget anyone.

Have an awesome week!

Love and Blessings,
Jackie

Wednesday, February 17, 2010

Consequences Pyramid Revised

You know how when you use something for awhile, you kind of get the kinks worked out? My sis and I decided to revise our consequences charts and I thought I'd share it with you all. We decided to take snacks off as a "code" and reserve "breaks" for when our children are emotionally unable to talk to us respectfully.

Here is how my Consequences Pyramid looks now (starting at the bottom and working up):

Code Blue: No movie 
Code Green: No computer, MP3 player or any other electronics.
Code Yellow: 1 hour rest time
Code Orange: 7pm bed time
Code Red: Immediately to bed (comes out only for meals, not allowed to play in room, has to be laying in bed).

The important thing is to keep the chart simple, so everyone knows what is coming next. It should start with the least severe punishment to the most extreme (this totally depends on what "speaks" to your child). My sis and I decided to remove "no snacks" as a punishment because with growing kids, that isn't a good thing. Now what they have as a snack is totally up to the parent(s). 

It seems like my son usually hits "Code Red" once a month, the next day he is a different child. But isn't this seriously just like us adults who struggle with our attitudes, too? I usually have a "freak" day once a month, it usually bites me, I get an attitude adjustment, and I do better for awhile. I have to expect the same thing is probably going to happen with my children and not be "surprised" when it does.

Since I've been using this system, I lose it much less. I used to get very angry at my children and often. I'm not saying I don't ever lose it, but I'm doing a lot better. Josiah is much less angry, too. He used to cry, scream and throw fits when I would discipline him. That rarely happens now. If it does, he gets a break. He excepts the consequences for his behavior so much better than he used to. This system is getting to his heart (and mine).  

Have a great Weekend!

God Bless,
Jackie

Homeschool Post Office Field Trip

Last week, our local Christian homeschool group took a trip to the Post Office. There were so many of us, we had to be split into two groups. It was so neat for the kids to see what happens to the mail in the post office. My kids brought letters to mail. They got to ride on the lift that helps load the mail on the delivery trucks.Amanda, a fellow MOPS table leader, was our tour guide. We got to be her first tour ever.Amanda is showing us the large mail bags.The kids wanted to be put in the bags and mailed. No such luck ;)The kids who brought letters got to stamp it with the official USPS stamp to show that it had been officially mailed.Then they got to put their letters directly into the drop box. We had a great time and learned a lot. Thanks, Amanda!

Happy Wednesday,
Jackie

Monday, February 15, 2010

Fun Valentine's Weekend

We had fun Valentine's weekend with the kids. It is fun now that they are older and really getting into the celebration. We had Cookie Grams delivered to each of the kids. They just felt so special, each getting an entire plate of "bad cookies" delivered to their door. They were really good about sharing with their parents :)Stealin' a kiss.Of course, I forgot to take pictures but, Michael and I were able to go to our Church's Valentines dinner. It was fabulous! Prime rib, pesto pasta with grilled veggies on top, cheesy garlic bread, salad and a delectable dessert I can't even think about pronouncing, all for $28. It was a fundraiser for a Mexico mission trip. We had a great time meeting some other church members. One couple has a 5 year old red-headed boy. So we compared notes on redheads all evening ;) But on Sunday night, we bought a Papa Murphy's Take and Bake heart-shaped pizza because Mama wasn't cookin' on Valentines Day. The kids thought that was just cool. We also went to the Dollar store and let them each buy each other a ballon and one toy since we don't do candy. They loved that, too.This was my Valentine's Day present. My hubby made it from scraps of wood he had lying around from our recent remodel. I love it! It fits perfectly under our new breakfast bar. I wanted a tall, sturdy bench instead of bar stools and that is just what I got. I love it! Thanks, Honey!Here are two of my goofy Valentines. They both have red long underwear. Josiah loves to walk around with a coffee cup (filled with tea) so he can look like his dad. It is just so darned cute. He'd live in that Union suit if I'd let him ;PLast but not least, here is my other Valentine, desperate for summer. Everytime I turn around she's in her swim suit wanting to swim in the bath tub. Hey, why not? She looks so much like Stacie and I when we were this age, except for the red hair of course!

I'm scheduling my next two posts for this week because I have to take my sicky computer to the doctor. I think I've got a virus, so hopefully I'll have my computer back by the beginning of next week and I can be blogging at lightning speed. So hang in there with me. I'll try to catch up with all your blogs as soon as I can.

Have a great week!

God Bless,
Jackie

Saturday, February 13, 2010

Michael's Projects: Fitting and Designing the T-Bucket/Wooden WWI Bi-Plane

Since this is a family blog, I convinced Michael to take some pictures of the projects he's been working on so I could post them. He's been busy working on his T-Bucket Roadster, getting the body work done. Here is a picture of the passenger's side of the body after all the ripples have been covered.  This is a picture of the driver's side with the door mounted and the costume extension that he added so that my knees won't be up around my ears when I try to drive this thing eventually. Michael was blessed by our friend, Billy, who is allowing him to use his large, heated shop to work on it during the winter. If you look just in front of the rear axles, you'll see the extension plates Michael added to lengthen the frame to fit the new body extension. He hasn't done anything to the motor yet.The kids love to go over to Billy's shop and "help" when Michael gets a chance to work on the T-Bucket. They think it is a wonderful go-cart. Still haven't replaced the tires or rims. Michael will do that last. At this point in the build, he is designing and fabricating the clutch and brake systems, which did not come with the original T-Bucket. For other posts about the T-Bucket, click here.

This wood and paper WWI bi-plane model was originally purchase by Josiah at a yard sale for $1. It had almost everything in it. Michael spent all his evenings putting it together when he was working out of town in last summer. I was so impressed that he actually wanted to do this. It was unbelievable complicated to put together with all it's wooden ribs. We hung it in Josiah's room, which looks really good with his curtains that have vintage airplanes printed on them.

Just had to brag about my Valentine for a bit. Happy Valentine's Day to you all!

Love and Blessings,
Jackie

Friday, February 12, 2010

Homemade Laundry Detergent/Stain Remover

Here is the last of my installments for the natural cleaning class I went to a few weeks ago. The only other thing we made was an all natural "409" multi-purpose cleaner that I already posted last year. Click here for that link. It works amazingly well on carpets, counters, sinks, stoves, etc. It costs less than $2.00 for 10 gallons of homemade laundry soap. You can't beat that!

OK, back to laundry soap. I had to order Fels-Naptha soap and Super Washing Soda from our local hardware store. Borax was easy to find in the laundry aisle. Fels-Naptha is kind of a mystery as to what is in it, but it does say it contains no Naphthalene. You could also use 2 bars of Ivory soap instead. Grated "Zote" is another option that is cheap and more natural than FelsNaptha. If you really want to go all natural, you can use Dr. Brommer's castille soap (not sure how much to use), but it is much more expensive.

Homemade Laundry Soap:
1 grated bar of Fels-Naptha, Zote or 2 Ivory bars laundry soap (can use a food processor to grate)
1 cup washing soda
1/2 cup Borax

Instructions:
Grate bar of soap. Add it to 4 cups of hot water and cook over medium heat, stirring constantly until soap is dissolved and melted. Fill a 5 gallon pail halfway with hot tap water, add melted soap, washing soda and borax. Stir until dissolved. Fill bucket the rest of the way with hot tap water. Cover with lid and allow to set overnight. In the morning, stir and fill a clean laundry container (I just use another 5 gallon bucket or milk jugs work, too) half full with soap, then fill the rest of the way with water. Stir or shake well. You can add 10 to 15 drops of essential oils if you want it scented. Shake before using. Use 1 cup with top loader machines.
My laundry came out looking great. If it still isn't getting clothes clean, keep increasing the amount until you're happy with the results. Also for whites, I add 1/8 cup borax to a large load of whites and use hot/warm water. If my whites are really dirty, I let them soak for an hour. Borax is an optical brightener.


Stain Remover:
Oh, do I hate having to buy Spray and Wash. It is so expensive and half the time I have to spray everything down twice because it didn't get it the first time. Mary suggested that instead of using Spray and Wash, we simply rub some of the undiluted laundry soap directly onto the stains. I tried it and it worked great! If my kid's clothes are really bad, I simply dip the whole garment into the bucket of detergent.

I had seen this recipe on someone else's blog and I thought it looked complicated. I watched Mary go through the whole process and I was amazed at how easy it was to make. I've got no excuses now. Boy, does it save money, too. Not only in laundry soap but stain removers, too.

Well, I think I've got all my cleaning basis covered, so this will be my last cleaning post for awhile. Hope you have enjoyed learning about these things as much as I have.

God Bless,
Jackie

UPDATE:
FYI - Just did some research and found that the Felsnaptha bar soap I use in my homemade laundry detergent is made from petro-chemicals. I found a safer alternative that is the same price, called "Zote". It isn't perfect, has some dye, but is sounds a lot safer than Felsnaptha which has toxicity issues when used over a long period of time. Zote is safe enough that you can use it to wash dishes. Zote Soap has non-abrasive ingredients and no salts that could massively deposit in the clothes, it can be used for delicates. Zote Soap contains optical brighteners chemically designed for hand washing. Zote Soap has no chlorine, and thus bleaches without fading color. Ingredients:   Zote Soap is made with coconut oil and tallow. It contains sodium chloride, glycerin, perfume, an optical brightener and dye. Zote Soap is scented with citronella oil, making the soap fragrance long lasting.


If you want to make your own all natural homemade laundry soap, instead of using Felsnaptha or Zote, click here for instructions.

Monday, February 8, 2010

First Visit From The Tooth Fairy

Josiah lost his first tooth Friday night. He waited until it literally fell out on it's own. No tooth pulling for this boy. I don't blame him, I was the same way. Josiah was quite the Tooth Fairy skeptic. He kept asking me if I believed in the Tooth Fairy. I used the avoidance tactic of "Well, all I know is when I woke up, there was a dime under my pillow where I left my tooth the night before". Luckily I convinced him to put his tooth on the desk beside him because he has camo sheets and this tooth was small! I'd have never found it. I was so tired, but I set the timer for 20 minutes after we went to bed so that we would remember to take the tooth away and leave a dollar (I guess the Tooth Fairy has to keep up with inflation rates). The next morning, Josiah comes running into our bedroom, all skepticism gone. He was so excited about that dollar bill. It was so funny, he was doing the math to see how much the rest of his teeth were worth.

Happy Monday Everyone!

Love and Blessings,
Jackie (aka Tooth Fairy)

Wednesday, February 3, 2010

Homemade Almost-Natural Dishwasher Soap "Recipe"

Here are the ingredients you'll need for this homemade dishwasher soap. When I first saw this recipe, I didn't think it was all that natural, but the gal who put on the cleaning class put it in perspective for me. You are using such a tiny amount of the Cascade Complete in each load, that it really isn't that bad for you or the environment. Mary said that one box of Cascade Complete will last her almost a year and she is like me, does 2 to 3 loads each day. The reason you need the Cascade Complete is for the citric acid. I had thought about making my own dishwasher soap before but when I went to the health food store and saw the price for a small bottle of citric acid, I thought I coudn't afford to make my own dishwasher soap. I've also heard of using KoolAid packets, but that could get expensive, too, plus how natural is KoolAid anyway, with all that dye ;P 

The other thing Mary said was that she had a dishwasher repair man come to her house and he said you don't need as much dishwasher soap as the instuction manuals say. In fact, using that much dishwasher soap can actually be hard on your machine. This recipe only calls for 1 Tbl of this powder mixture for each load.  

Homemade Almost-Natural Dishwasher Soap "Recipe"

1 part borax (laundry aisle)
1 part washing soda (I had to order this through my local hardware store)
1 part Cascade Complete Powder

Mix well and store in a plastic bag or container. Use one Tbl for each load.

I've been using this and I can't believe how much cleaner my dishes are and how white the inside of my dishwasher is now. Before I took this class, I had just bought some cheap dishwasher soap from Walmart and now I'm avoiding it. I think I may give it away because I don't think I can go back to using it. I'm so happy to have found a CHEAP and EASY way to make dishwasher soap that will not only save me money, but cleans so well. While it isn't perfectly natural, it is way more natural than what I have been using. Stay tuned, next week is homemade laundry soap and stain remover.

Now go forth and wash dishes!

God Bless,
Jackie

P.S. I also forgot to mention that you can use straight vinegar in place of Jet Dry. I just splash a few Tbls onto the open door before I run it. It works just as well, is cheaper and all natural.

Monday, February 1, 2010

Productive Weekend of Scrapbooking

I got just got back from 3 days of scrapbooking bliss. My sister and I left the kidlets (except Lily - she's still nursing) with our husbands and met at my mom's house for a wonderfully productive weekend of scrapbooking. We try to do this twice a year. I seem to stay caught up if I can manage to go to two scrapbook camps each year. The thing I look forward to the most isn't the scrapbooking necessarily, but uninterrupted conversation with my sister and mom. These are rare moments indeed. We usually have 8 children (between us) who are needing our attention. We can leave all of our scrapbooking stuff out the whole three days. I snapped this picture of Lily Pie. She was an absolute darling and did so well. This used to be Hailey's outfit. I found it at a second hand store. So glad to see it again on Lily.Stacie was able to get a lot done even with her "baby handicap". Her pile is on the left. Mine is on the right. I did 80 pages (minus journaling - always like to do that later on my computer at home), but by golly, I got through my picture pile. It is always overwhelming when I first start. I promised myself I wouldn't get overwhelmed this time and just take it one page at time. With this attitude, I managed to get all my pictures scrapped by the end of the weekend. Josiah wanted to take a family picture when I got home last night. Can you tell I was absolutely exhausted? Poor Michael. Hailey got sick this weekend, so he had to deal with a sicky. She's feeling much better now, but still hasn't got much of a voice. He did a great job of taking care of her. The kids kind of hurt my feelings though because they all gave me a casual "hi Mom" when I walked in the door. Michael can be gone for 9 hours and they freak when he shows up. I'm gone for 3 days and they could care less. I just want to say, "Hello, I gave birth to you people!" LOL! Oh well, they must have had fun with their dad, so that is a good thing. Hope you all had an awesome weekend. I look forward to catching up with your blogs some time this week.

Love,
Jackie

LinkWithin

Related Posts with Thumbnails